
How to Throw a Knuckle Curveball: Grip and Release
Learn the modern knuckle curveball grip, middle-finger release cue, practice checkpoints, and age and workload guidance for developing pitchers.
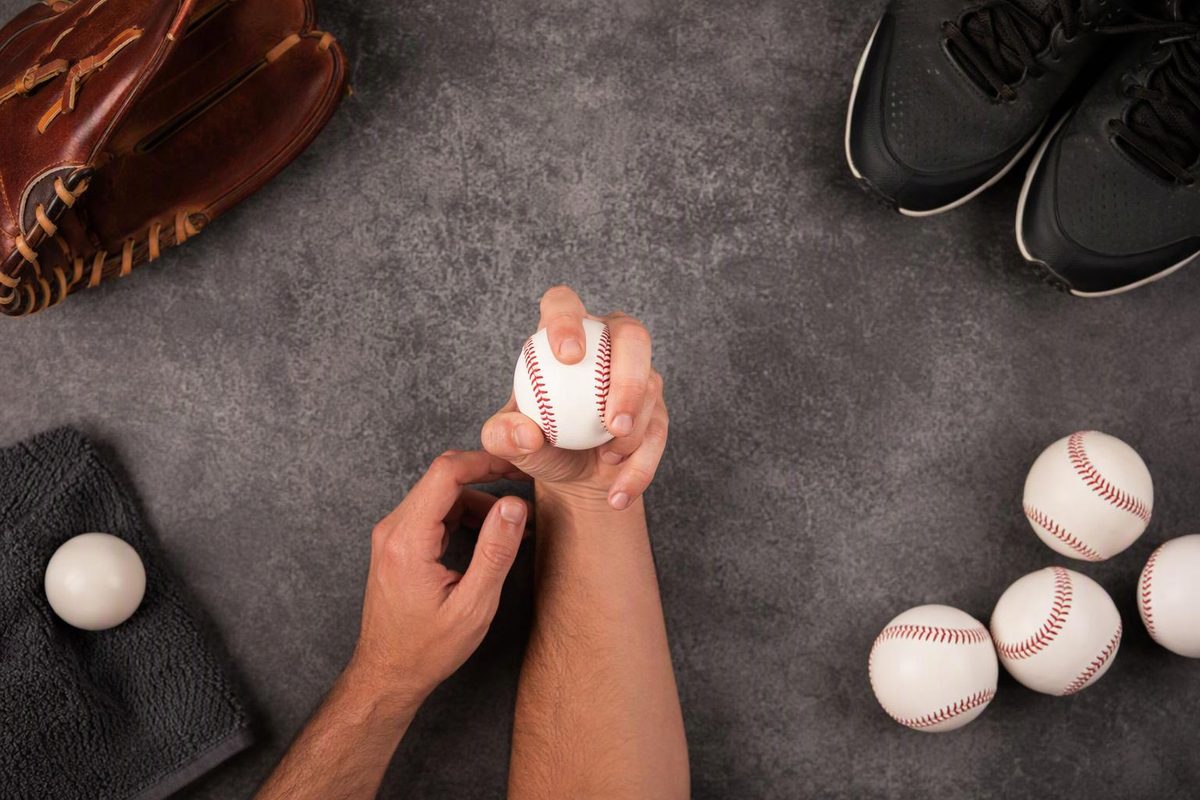
To throw a modern knuckle curveball, set your middle finger along a seam, bend your index finger so its tip or nail rests against the leather, and support the ball with your thumb underneath. Throw it as a curveball, using your middle finger to create spin—not as a low-spin knuckleball.
Often called a spike curve, this is a curveball grip variation rather than an entirely separate pitch. Its movement is downward, often with some break toward your glove side. The defining grip change is the bent index finger. MLB’s knuckle-curve glossary describes the common nail-on-ball version.
Before adding the pitch
For youth pitchers, readiness comes before grip experimentation. Pitch Smart’s ages 9–12 guidance recommends throwing only fastballs and changeups. Its ages 13–14 guidance allows breaking pitches after developing a consistent fastball and changeup—not simply after a birthday.
If those foundations are still inconsistent, work on your four-seam fastball and changeup first. For pitchers ready to learn a breaking ball, have a coach observe the grip and delivery.
1. Set the spike grip
Use a regular baseball and start with these contact points:
- Middle finger: Place it along a raised seam where the finger pad can get a secure hold.
- Index finger: Bend it and rest the fingertip or nail against the leather beside the middle finger. The index knuckle stays raised off the ball.
- Thumb: Place it on the opposite side of the ball, underneath, to support the grip.
- Ring finger: Let its side or knuckle help steady the ball. Keep the pinky relaxed and out of the way.
The middle finger does most of the spin-producing work. Index-finger pressure can vary with comfort; you do not need to force the nail into the leather. Some pitchers use index-knuckle contact instead of fingertip contact. These variations appear in Driveline’s curveball grip guide.
Checkpoint: Can you set the same grip repeatedly without finger discomfort or a hard squeeze? If not, adjust the index contact or compare it with a standard curveball grip. A spike grip is an option, not a requirement.
2. Use a curveball release
Keep your familiar delivery rhythm and arm slot rather than inventing a new throwing motion for the grip.
At release, the hand is slightly to the side of the ball, allowing the fingers to get in front of it and pull down to produce topspin—the forward rotation associated with curveball drop. Use one cue: “Spin the ball with your middle finger.” Driveline describes this release and recommends that cue in its curveball instruction.
Do not turn that cue into an exaggerated wrist twist or try to throw a knuckleball by removing spin. You are learning a spinning breaking pitch.
Checkpoint: Have your catcher or coach watch both rotation and flight. Look for repeatable downward break, not one spectacular pitch. Some sideways break is normal; do not force a straight “12-to-6” shape by changing your arm slot. Driveline’s movement guide explains that lower arm slots tend to produce more horizontal break.
3. Practice for repeatability
Treat the first session as a grip comparison, not a new high-volume workout:
- Warm up through your usual gradual throwing progression.
- Rehearse the grip without throwing until the contact points are easy to find.
- Within a coach-planned throwing session, try a small block at controlled effort to a catcher with a clear target.
- Note grip comfort, whether the catcher sees consistent spin, and where pitches finish.
- Change only one variable at a time—such as index pressure or middle-finger seam placement.
If the pitch slips or finishes inconsistently, reset the grip before adding effort. If the spike contact hurts, stop using it rather than trying to toughen the finger through more throws.
Include this work in your total throwing plan; do not add it after an already tiring bullpen. Follow age-based game pitch-count and rest guidance, and account separately for practice throws rather than treating the game limit as a practice allowance. If fatigue appears, stop throwing. If elbow or shoulder pain occurs, discontinue pitching until evaluated by a sports-medicine physician, as recommended by the American Sports Medicine Institute.