
A Conservative Shoulder Isometric Routine for Pitchers
Use three pain-free shoulder isometrics to train steady tension and position, with a conservative dose, progression checks and clear stop signs for pitchers.
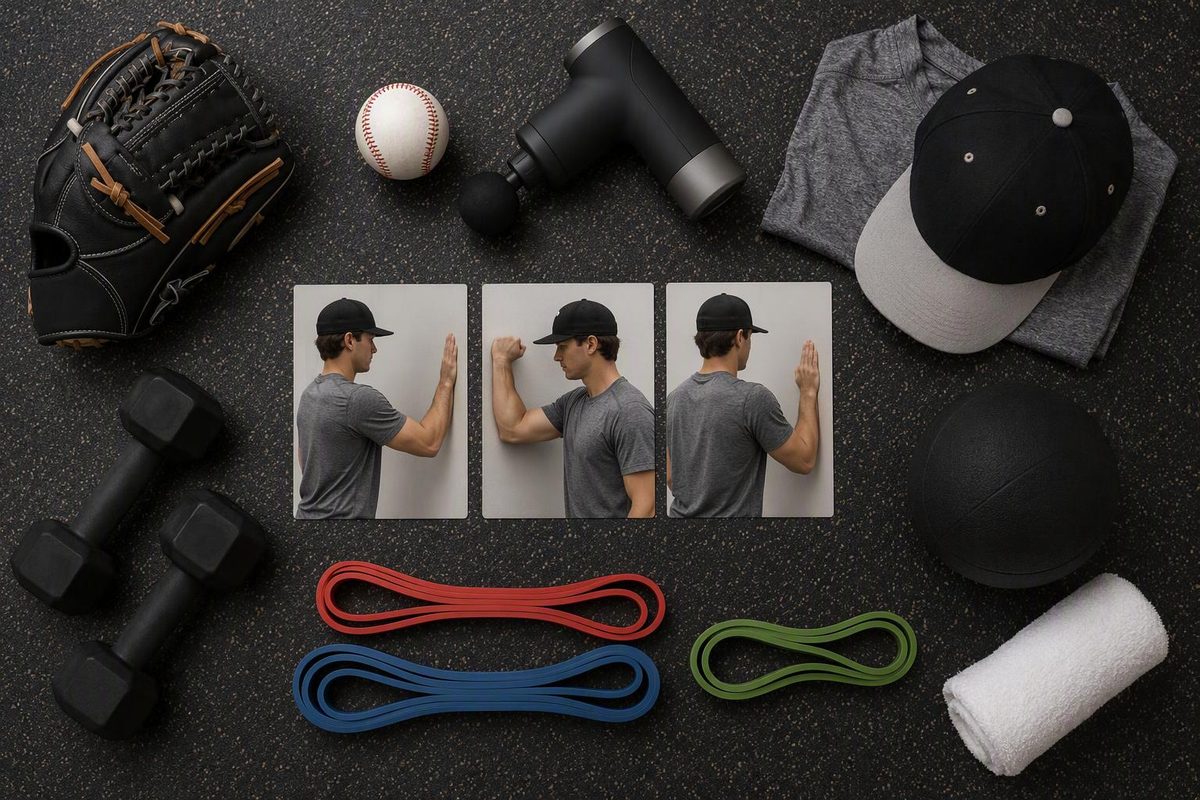
For a healthy, pain-free pitcher, shoulder isometrics can train steady tension while the joint remains still. Start with three directions, using three 10-second holds per arm at light or moderate effort. They are not treatment for an injured arm, a substitute for throwing-workload limits or a complete arm-care program.
Because the wall or opposite hand prevents movement, leaning, shrugging and twisting are easy to spot. The pitcher should be able to breathe normally and finish without pain, pinching or unusual fatigue.
Choose the arm status, hold quality and throwing schedule to get the appropriate next step.
Shoulder Isometric Session Check
Use the current condition of the arm, not what the pitcher hoped to complete today.
Two nonconsecutive sessions per week is a reasonable starting point within a broader strength program.
Start With Three Shoulder Isometrics
Do these drills after 5–10 minutes of general movement and shoulder preparation. Our baseball warm-up shows how to progress from whole-body activity toward throwing.
Use the following starting dose for each drill:
- Stand tall with your ribs over your hips.
- Bend the working elbow to 90 degrees and keep it close to your side. A small rolled towel between the elbow and ribs can help.
- Build pressure gradually to a light or moderate effort, not an all-out push.
- Hold for 10 seconds while breathing normally.
- Relax fully, then repeat for 3 holds on each arm.
- Rest about 30 seconds before changing directions.
This is a conservative practice template, not a universal prescription. Clinical shoulder-exercise instructions use similar stationary internal- and external-rotation presses for three 10-second holds, with no movement as the main checkpoint (Dorset NHS Musculoskeletal Matters). Those instructions were written for patients with shoulder conditions, so they do not establish the optimal dose for healthy pitchers.
External-Rotation Wall Press
Setup: Stand sideways with the throwing arm closest to a wall. Bend the elbow to 90 degrees and place the back of your hand against the wall.
Action: Press the back of the hand into the wall as if turning the forearm away from your stomach. The wall prevents movement.
Checkpoint: Keep the elbow beside the ribs, the wrist straight and the torso upright. The muscles at the back of the shoulder may work, but there should be no pinch at the front of the shoulder.
Internal-Rotation Hand Press
Setup: Keep the throwing elbow bent and tucked at your side. Place that palm against the palm of your opposite hand.
Action: Press the throwing-side palm inward while the other hand supplies equal resistance.
Checkpoint: Neither hand moves. Keep both shoulders level and avoid twisting your chest. The Sussex Community NHS exercise guide demonstrates the same palm-to-palm position with the elbow bent at the side.
Abduction Wall Press
Setup: Stand sideways with the outside of the throwing-side arm against a wall and the elbow bent. Keep the arm down rather than raising it to shoulder height.
Action: Press the outside of the arm into the wall as if beginning to lift the arm sideways.
Checkpoint: Keep the shoulder away from the ear. The torso remains upright, and the hips do not slide toward the wall. The Sussex guide also describes this no-movement wall press using 5–10-second contractions.
Begin With Two Nonconsecutive Sessions Per Week
Two sessions per week on nonconsecutive days is a reasonable starting point when these drills are part of a strength program. The American Orthopaedic Society for Sports Medicine recommends two or three nonconsecutive strength sessions per week for youth, along with qualified instruction, light starting resistance and gradual progression (AOSSM). That is general youth strength guidance, not a pitcher-specific isometric schedule.
The holds can fit into a broader baseball workout plan, but they should not be piled onto an already fatigued arm. During the first few sessions, avoid placing them immediately before a game, bullpen or high-intent throwing session. This makes it easier to judge how the arm responds. If the drills are later used before throwing, keep the effort and volume low enough that the shoulder does not feel tired.
Youth athletes should learn the positions under adult supervision rather than experimenting alone. The American Academy of Pediatrics advises young athletes to warm up, learn technique before adding resistance, avoid holding their breath and stop strength exercise if pain occurs (HealthyChildren.org).
Progress Only After Every Hold Looks the Same
Stay with the starting dose until every hold looks the same and the arm feels normal later that day and the following morning. Then change only one variable:
- Increase from 3 to 4 holds; or
- Press slightly harder while maintaining the same position and normal breathing.
Do not increase both at once. A wall provides no useful measurement of force, so more pressure is not automatically better. Reduce the effort if the pitcher starts leaning, shrugging, twisting or holding their breath.
Once these positions are easy to control, the next step may include controlled band rotation, rows and exercises for the shoulder blade, trunk and lower body. Those moving exercises belong in a balanced baseball exercise program, not as random additions to a pregame routine.
Shoulder Isometrics Cannot Bulletproof an Arm
A few stationary presses do not prevent every throwing injury. A clinical review of adolescent baseball arm care found that the injury-reduction benefit of shoulder strengthening is unclear. It concluded that programs addressing multiple needs across the body may be more comprehensive than programs aimed at one isolated issue (Journal of Athletic Training clinical review).
Isometrics also do not make it acceptable to pitch through fatigue, exceed pitch-count and rest guidance, or throw with pain. If a youth pitcher reports shoulder or elbow pain, stop pitching until the player has been evaluated by a sports-medicine physician, as the American Sports Medicine Institute recommends.
Stop the drills if they cause pain, pinching, numbness, tingling or a loss of normal arm motion. The standard for continuing is steady pressure, no joint movement, no compensation and no pain.