
A Repeatable Routine From First Movement to First Full Throw
Move from whole-body activity and dynamic mobility to faster drills, shoulder and wrist prep, then easy throwing with gradual increases in distance or intent.
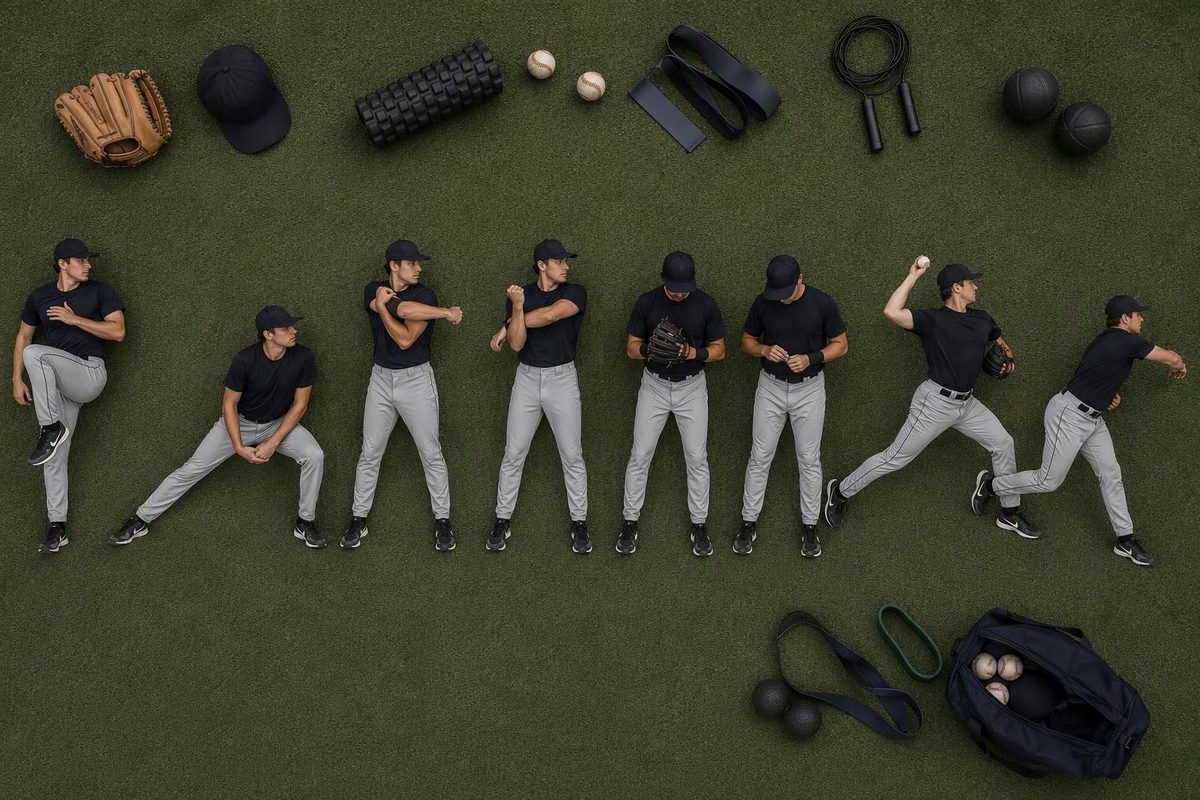
A practical baseball warm up should move in stages: whole-body movement, dynamic mobility, faster movement, shoulder and wrist preparation, then easy throwing with gradual increases in distance or intent. The 12–15 minute routine below is a coaching template, not a universal prescription. Adjust it for the player’s age, conditioning, position, available space, recent workload, and comfort that day.
The 12–15 minute warm-up checklist
Use these four phases before practice or a game. The suggested times and repetitions are programming choices, not proven requirements. Younger players may need fewer drills and more instruction, while experienced players and pitchers may need a longer throwing phase.
For comparison, USA Baseball’s Stage 3 curriculum for ages 12–14 assigns 15 minutes at every practice to a combined dynamic/static warm-up. That is a curriculum choice for that age group—not evidence that every player needs exactly 15 minutes (USA Baseball’s Stage 3 skills matrix).
Phase 1: Controlled whole-body movement — 2–3 minutes
- Light jog or spot jog
- Jumping jacks
- Controlled marching with arm movement
Begin easily. This phase starts the transition into activity; it should not become a conditioning test. Brisk walking, marching, or controlled step-outs can replace jogging and jumping when a lower-impact option is appropriate.
Phase 2: Dynamic mobility — 3–4 minutes
Complete about 4–6 controlled repetitions of selected movements:
- Knee-to-chest walks
- Body-weight squats
- Walking lunges
- Toe touches
- Inchworms
- Reverse lunges with rotation
- Lateral lunges with reach
Choose enough drills to address the whole body without rushing. Use a comfortable range of motion rather than forcing depth, rotation, or flexibility to match a teammate.
Phase 3: Faster movement and arm preparation — 3–4 minutes
Choose two or three movement drills:
- High knees
- Butt kicks
- Lateral shuffles
- Carioca
- Skips
- Short build-up runs
Then prepare the upper body:
- Small-to-large arm circles
- Cross-body arm swings
- Wall angels
- Bent-over Y/T/W raises
- Gentle wrist flexion, extension, and circles
A practical starting point is 10–20 seconds or 4–8 controlled repetitions per selected movement. Scale those numbers rather than treating them as a required dosage. In limited space—or when impact tolerance is lower—use quick marching, low skips, compact shuffles, and controlled steps instead of jumps or sprints.
Phase 4: Progressive throwing — about 4 minutes, plus role-specific work
- Begin with gentle wrist and hand movements
- Make easy throws at close range
- Continue comfortable catch while gradually increasing distance
- Transition into throws that match the next activity
- If scheduled to pitch, continue into a separate throwing and bullpen progression
Keep the first throws smooth and comfortable. Do not jump directly from arm circles to maximum-distance catch or game-intent pitching.
These phase ranges total about 12–15 minutes before any additional pitcher-specific work. The clock remains secondary to the sequence: a player who is stiff, rushed, unusually fatigued, or uncomfortable throwing should not advance simply because the scheduled time has elapsed.
Why the warm-up starts before you pick up a ball
Throwing is a whole-body action. Preparing only the throwing arm leaves most of that chain out of the routine.
That is why general movement should come before catch rather than treating catch as the entire warm-up. TRIA’s baseball guidance follows the same broad progression: warm the whole body, give additional attention to the arms and shoulders, move from controlled exercises to quicker drills, and then begin throwing (TRIA’s dynamic baseball warm-up guidance).
The order also functions as a practical readiness check. Quicker drills then introduce more speed and baseball-relevant footwork. Upper-body preparation bridges the gap between general movement and throwing.
Balance, coordination, rotation, agility, and general athleticism are relevant whether a player is controlling a pitching delivery, moving laterally in the infield, accelerating in the outfield, or rotating during a swing. A consistent team order can also reduce confusion because players know where to line up and what comes next.
None of this establishes that the routine prevents injury or improves velocity, command, or game performance. Its supported practical value is more modest: it creates an orderly transition from rest to increasingly specific baseball activity.
Phase by phase: what each movement prepares
Organize drills by purpose. That allows coaches to exchange one exercise for another without losing the progression.
Controlled movement and mobility
Knee-to-chest walks combine single-leg balance with comfortable hip movement. Stay tall instead of pulling the knee as high as possible.
Body-weight squats involve the ankles, knees, hips, and trunk together. Use a depth the player can control comfortably.
Walking lunges add split-stance control. Shorten the step or use reverse lunges when forward lunges feel awkward.
Toe touches introduce controlled movement through the back of the legs. Alternate toward each foot without bouncing or forcing range.
Inchworms connect the shoulders and trunk with the hips and legs. Shorten the hand travel when the full movement is too demanding.
Reverse lunges with rotation add gentle trunk rotation to a split stance. The goal is controlled movement, not maximum twisting.
Lateral lunges with reach prepare side-to-side movement. Keep the planted foot stable and choose a manageable depth.
Faster movement
High knees and butt kicks increase movement speed without requiring a full sprint. Both can be performed in place.
Lateral shuffles introduce side-to-side footwork. Keep the steps compact when space is tight or the surface is uncertain.
Carioca combines lateral travel with coordination and rotation. Use it only when the player can control the crossing pattern.
Skips add rhythm and coordination. They can remain low and easy instead of becoming explosive.
Short build-up runs begin easily and finish faster rather than demanding an instant sprint. The endpoint should fit the player, surface, space, and next activity.
Pogos, power skips, split jumps, skater jumps, and sprint starts are optional—not standard requirements. Replace them with marching, low skips, compact shuffles, or controlled build-up steps when age, conditioning, workload, symptoms, surface, or space makes impact or acceleration unsuitable.
Upper-body preparation
Arm circles can progress from small to larger circles without forcing the shoulder to its end range.
Cross-body arm swings add movement across the chest. Keep them loose rather than aggressive.
Wall angels use a wall as a movement reference. The player does not need to force the hands or elbows against it.
Bent-over Y/T/W raises move the arms through three shapes while the trunk remains controlled. Body weight is enough unless the player has a separate individualized program.
Gentle wrist movements can include circles, flexion and extension, and easy wrist flicks before catch.
No individual drill is mandatory. Select exercises that preserve the intended order and that the player can perform comfortably and under control.
Use a throwing ladder, not a first-pitch test
The first throw should begin a transition—not test how hard or far the player can throw.
-
Wrist and hand movements Begin with gentle wrist circles, flexion and extension, or easy wrist flicks.
-
Easy close-range throws Use a comfortable arc and relaxed intent. Focus on smooth exchanges rather than velocity.
-
Comfortable catch at increasing distance Move apart gradually while throws remain controlled. There is no universal distance, throw count, or effort percentage.
-
Position-specific throws Infielders can move into controlled exchanges and throws across the diamond. Outfielders can add approach footwork before longer throws. Catchers can transition into movements relevant to the next drill.
-
Separate pitcher progression That may include more catch, delivery work, and a bullpen sequence established by the player and coach.
Distance and intent can rise without reaching a predetermined maximum. A player preparing to hit may finish at a different point from an infielder preparing for defensive work. Starting pitchers, relief pitchers, and players with substantial recent throwing exposure may also need different endpoints.
Position players can transition from catch into fielding, baserunning, or batting preparation. A pitcher’s additional work belongs in the pitcher’s plan; it should not be replaced by making the whole team sprint harder or perform more jumps.
Adapt the routine without losing the sequence
The drills can change while the order remains intact:
Whole body → mobility → faster movement → arm preparation → throwing
For limited space, substitute spot jogging, jumping jacks, marching, compact lunges, in-place high knees, and short shuffles for long running drills. If a clear lane is available, use brief controlled accelerations rather than assuming every drill must cover 90 feet.
For a lower-impact session, choose brisk walking, knee-to-chest walks, shallow squats, reverse lunges, low skips, and compact shuffles. Movement can become quicker without adding jumps or full sprints.
For a solo warm-up, complete the non-throwing phases independently. Throw only when the facility offers a safe option intended or approved for that use. Do not improvise with a wall, fence, or other surface that could create an unpredictable rebound or endanger someone nearby.
For pitchers, retain the general team sequence and add an individualized throwing or bullpen phase. For catchers and position players, use the next activity to guide the transition—receiving footwork, ground-ball exchanges, outfield approach steps, or controlled swings. These are examples, not universal position-specific protocols.
A consistent team order improves efficiency while still allowing individual adjustments. One player can march while another skips, or use compact shuffles while teammates cover more ground.
For youth pitchers, warm-up is only one part of workload management
A good warm-up does not erase fatigue, replace required rest, or make an excessive workload safe. For pitchers ages 9–12, MLB Pitch Smart advises proper warm-up, fatigue monitoring, game-pitch limits, required rest, and at least four months away from throwing each year, including two to three continuous months (MLB Pitch Smart guidance for ages 9–12).
| Age | Daily game maximum | Pitches and required rest |
|---|---|---|
| 9–10 | 75 | 1–20: 0 days; 21–35: 1; 36–50: 2; 51–65: 3; 66–75: 4 |
| 11–12 | 85 | 1–20: 0 days; 21–35: 1; 36–50: 2; 51–65: 3; 66–85: 4 |
These are game-pitch limits for the specified ages, not general rules for every player. Following them also does not establish that injury risk has been eliminated.
The guidance does not explain whether bullpen, practice, or warm-up throws count toward the official game-pitch maximum. Coaches and families should not invent an official counting rule from that silence. They can still monitor the player’s broader throwing exposure across warm-ups, bullpens, practices, games, lessons, showcases, and multiple teams.
When workload and warm-up point in different directions, workload governs the decision. A player who requires rest or shows unusual fatigue is not made ready by adding more mobility drills or catch.
Pain, stretching, and readiness to continue
Stretching should remain comfortable and should not be painful. If a stretch hurts, stop that stretch rather than forcing additional range (TRIA’s baseball guidance).
The available guidance does not support an all-or-nothing rule against static stretching. USA Baseball’s ages 12–14 curriculum includes a combined dynamic/static warm-up, while another USA Baseball article favors movement-based dynamic flexibility over traditional seated or lying static stretching (USA Baseball’s athleticism guidance). These are coaching recommendations, not proof that one method is conclusively superior in every situation.
Before activity, keep any stretching comfortable and prioritize movements that resemble what the player is preparing to do: walk, shuffle, rotate, raise the arms, and throw progressively. Static positions, if used, should not become a painful flexibility contest or displace the active movement and throwing progression.
A general routine cannot assess an arm or provide medical clearance.
Remember the order: move the whole body, add mobility, build speed, prepare the arm, and increase throwing gradually. Keep the sequence consistent, but adjust the drills and workload to the individual. Pain or unusual symptoms call for qualified evaluation—not a harder warm-up.